sand castle central homesandcastlecentral.com

sand castle tips and tricks
sandcastle lessons and workshops
sandcastle tools and equipment
sandcastle contests
sand sculpture books, videos and dvds
sand sculpture online resources

"Rad" Forms 101

proudly hosted by
sons of the beach sand castle wizards

sandyfeet.com

StudyWeb Academic Excellence Award

What you need:
  • a roll of 30 weight roofing paper (felt)
  • a roll of duct tape (recommended)
  • small C-clamps - at least 2 per form
  • a tamper - these can be found in larger hardware stores, or you can make your own by sticking a broom handle into a coffee can filled with cement. If the sand you are working with has a high enough clay content, you may be able to tamp the sand sufficiently by using your feet.
  • a long handled shovel
  • lots of sand and access to water
Tamp or stamp the base flat before positioning the form tamp base
c-clamp 
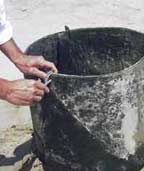
Secure top and bottom with C-clamps 1. Start by cutting the paper into various lengths. A 10' long piece of paper, coiled to double thickness, will give you a form measuring about 19" in diameter. Each level should be a least 5 inches smaller than the level it rests on. Coil it smoothly so that there are no gaps between the layers.

2. (Recommended) Fold pieces of duct tape into several layers to serve as "washers" for the C-clamps - one on the top, another on the bottom. Seal the inside seam with a strip of duct tape to prevent water leakage.

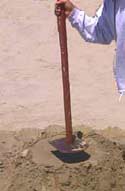
3. Tamp or feet-pack the surface so that it is flat and level and position the form on it.

next

pages 1 - 2 - 3

[home] [about this site]